


XML Parsing using Azure Data Factory
- Rohit Kumar

- Jul 12, 2022
- 6 min read

Overview
There can be a scenario where one may need to process data coming from XML files and those XMLs can get quite complex in structure meaning that data can get multiple XML tag levels deep with some tags also having multiple occurrences at different depths. In such a case, if we do not have access to an XML schema (XSD or dtd), we can have a hard time getting the data load moreover there can be processing issues related to the size of XML provided.
Recently we got stuck in a similar scenario, getting the data processed was a challenging task and after trying multiple approaches and numerous Integration tools it was ADF that we finally went ahead with.
Sample XML Code -
Before starting with anything, let’s have a look at sample xml file.
<Items xmlns="http://xmlns.oracle.com/apps/some/productModel/common/publicationServicesB6G/">
<ns1:Item xmlns:ns17="http://xmlns.oracle.com/apps/some/productModel/items/flexi/item/" xmlns:ns1="http://xmlns.oracle.com/apps/some/productModel/common/publicationService/" xmlns:ns4="http://xmlns.oracle.com/apps/some/productCatalogueManagement/advancedItems/flexi/egoItem/items/category/" xmlns:ns0="http://xmlns.oracle.com/adfe/service/types/" xmlns:ns18="http://xmlns.oracle.com/apps/some/productModel/items/flexi/itemGdf/" xmlns:ns9="http://xmlns.oracle.com/apps/some/productModel/items/itemRelationshipService/" xmlns:ns5="http://xmlns.oracle.com/apps/some/productModels/item/itemServicesV8/" xmlns:ns12="http://xmlns.oracle.com/apps/some/productModel/item/structure/structureServiceV8/" xmlns:xsi="http://www.w3.org/2001/XMLSchema-instance" xsi:type="ns1:Item">
<ns1:Item>1234567890</ns1:Item>
<ns1:Organization>1234567890</ns1:Organization>
<ns1:OrganizationCode>TST</ns1:OrganizationCode>
<ns1:ItemClass>Training</ns1:ItemClass>
<ns1:Template xsi:nil="true"/>
<ns1:ItemNumber>APP563772</ns1:ItemNumber>
<ns1:ItemDescription>Test for complex XML load</ns1:ItemDescription>
<ns1:ApprovalStatus>Approved</ns1:ApprovalStatus>
<ns1:ItemCategory xmlns:ns3="http://xmlns.oracle.com/apps/some/" xsi:type="ns4:Ivcformula">
<ns4:InventoryItemId>123456789</ns4:InventoryItemId>
<ns4:OrganizationId>123456789</ns4:OrganizationId>
<ns4:StyleItemId>123456789</ns4:StyleItemId>
<ns4:MasterOrganizationId>123456789</ns4:MasterOrganizationId>
<ns4:Planner__and__TestCase xmlns:ns2="http://xmlns.oracle.com/apps/some/productCatalogManagement/advancedItems/protectedModel/">
<ns2:ContextCode>Planning for Tes Case</ns2:ContextCode>
<ns2:CreatedBy>Alpha.User</ns2:CreatedBy>
<ns2:CreationDate>2050-02-14T12:35:21.956</ns2:CreationDate>
<ns2:EffLineId>123456789</ns2:EffLineId>
</ns4:Planner__and__TestCase>
<ns4:ItemNumberSequencing xmlns:ns2="http://xmlns.oracle.com/apps/some/productCatalogManagement/advancedItems/protectedModel/">
<ns2:ContextCode>Generation</ns2:ContextCode>
<ns2:CreatedBy>Alpha.User</ns2:CreatedBy>
<ns2:CreationDate>2050-02-14T12:35:23.121Z</ns2:CreationDate>
<ns2:EffLineId>123456789</ns2:EffLineId>
<ns2:InventoryItemId>123456789</ns2:InventoryItemId>
<ns2:LastUpdateDate>2022-02-14T10:35:25.291Z</ns2:LastUpdateDate>
<ns3:suffix>Beta</ns3:suffix>
<ns3:RedLinesuffix xsi:nil="true"/>
</ns4:ItemNumberSequencing>
<ns4:Manufacturing xmlns:ns2="http://xmlns.oracle.com/apps/some/productCatalogManagement/advancedItems/protectedModel/">
<ns2:ContextCode>Manufacturing</ns2:ContextCode>
<ns2:CreatedBy>Alpha.User</ns2:CreatedBy>
<ns2:CreationDate>2050-02-14T12:35:23.124Z</ns2:CreationDate>
<ns2:EffLineId>1234567889</ns2:EffLineId>
<ns2:InventoryItemId>123456789</ns2:InventoryItemId>
</ns4:Manufacturing>
<ns4:Header xmlns:ns2="http://xmlns.oracle.com/apps/some/productCatalogManagement/advancedItems/protectedModel/">
<ns2:ContextCode>Header Info</ns2:ContextCode>
<ns2:CreatedBy>AlphaC.User</ns2:CreatedBy>
<ns2:CreationDate>2050-02-14T12:35:23.128Z</ns2:CreationDate>
<ns2:LineId>987654321</ns2:LineId>
<ns2:InventoryItemId>987654321</ns2:InventoryItemId>
<ns3:quantity>1000</ns3:quantity>
</ns4:Header>
<ns4:Header xmlns:ns2="http://xmlns.oracle.com/apps/some/productCatalogManagement/advancedItems/protectedModel/">
<ns2:ContextCode>Header Info</ns2:ContextCode>
<ns2:CreatedBy>AlphaB.User</ns2:CreatedBy>
<ns2:CreationDate>2050-02-15T12:35:23.128Z</ns2:CreationDate>
<ns2:LineId>258963147</ns2:LineId>
<ns2:InventoryItemId>258369147</ns2:InventoryItemId>
<ns3:quantity>12</ns3:quantity>
</ns4:Header>
<ns4:Header xmlns:ns2="http://xmlns.oracle.com/apps/some/productCatalogManagement/advancedItems/protectedModel/">
<ns2:ContextCode>Header Info</ns2:ContextCode>
<ns2:CreatedBy>AlphaA.User</ns2:CreatedBy>
<ns2:CreationDate>2050-02-17T18:35:23.128Z</ns2:CreationDate>
<ns2:LineId>9514785362</ns2:LineId>
<ns2:InventoryItemId>9514785362</ns2:InventoryItemId>
<ns3:quantity>125</ns3:quantity>
</ns4:Header>
</ns1:ItemCategory>
<ns1:QuantityRevision xmlns:ns6="http://xmlns.oracle.com/apps/some/productModel/items/flex/itemRevision/" xmlns:ns7="http://xmlns.oracle.com/apps/some/productCatalogManagement/advancedItems/flexi/egoItemEff/itemRevision/categoriy/">
<ns5:RevisionId>4564564564564</ns5:RevisionId>
<ns5:ItemId>12345678987</ns5:ItemId>
<ns5:Organization>1234567890</ns5:Organization>
<ns5:RevisionCode>00</ns5:RevisionCode>
<ns5:ItemRevisionDescription xsi:nil="true"/>
<ns5:RevisionReasonValue xsi:nil="true"/>
<ns5:ItemRevision>
<ns6:RevisionId>30005940156</ns6:RevisionId>
<ns6:Context xsi:nil="true"/>
<ns6:Context_DValue xsi:nil="true"/>
<ns6:NumOfSegments>5</ns6:NumOfSegments>
</ns5:ItemRevision>
<ns5:ItemRevision>
<ns6:RevisionId>1231231231</ns6:RevisionId>
<ns6:Context xsi:nil="true"/>
<ns6:Context_DValue xsi:nil="true"/>
<ns6:NumOfSegments>5555</ns6:NumOfSegments>
</ns5:ItemRevision>
<ns5:RevisionCategory xsi:type="ns7:Ivcformula">
<ns7:RevisionId>30005940156</ns7:RevisionId>
<ns7:CategoryCode>TestFail</ns7:CategoryCode>
<ns7:VersionId>-1</ns7:VersionId>
</ns5:RevisionCategory>
</ns1:QuantityRevision>
</ns1:Item>
</Items>
In this file, we have multiple XML tags and depth of XML tags also varies.
Items -> Item -ItemCategory -> Planner__and__TestCase
Items -> Item -> ItemCategory -> ItemNumberSequencing
Items ->Item -> ItemCategory -> Manufacturing
Items - Item -> ItemCategory -> Header (Has multiple occurances)
This is a good example of nested loop where Header tags repeat at a certain level.
In ADF pipeline, For our requirement, we can proceed with two different approaches.
· Copy data to sink table without transforming anything in the data.
· Copy data with data cleansing activity involved.
The first part is relatively simple using Copy data activity, data is loaded in to the sink (target) system without any modification.
But if we want some cleansing or modification to our data, we can proceed with Dataflow activity. Dataflow activity let us use various other transformations as per our requirement. But to mention, one big difference between Copy and Dataflow tasks is that the Copy activity automatically flattens the XML tags present in the input file but in dataflow, we must do it manually.
For this demo we will consider loading data in XML file from blob storage to SQL Server database:
Note: In the copy activity, we will start directly with creating a pipeline.
Copy data Activity
1. Create a new pipeline under the pipelines menu.

Here we can directly create a pipeline, or to personalize more we can first create a folder and then inside that folder create a pipeline.
2. Here under Move & transform we can see Copy data activity. Drag and drop this to the development pane.

3. Once we have copied the activity in canvas, under the General tab we can rename it.

4. Under the Source tab, we can create a new dataset or use the existing one.
When creating a new dataset, click on New. In the New, Integration dataset we will look for Azure Blob Storage and click continue.


Click Continue. This will give us the option to select a linked service, either create a new or select from the existing list.

To create new, click on +New and we can insert the source connection details.

Once the link service is created and the connection is tested, we can proceed to select the file from the blob storage.

Click on browse and select the loaded file.

Under the file path type, select the File path in the dataset.

Under the sink settings, we can similarly create a sink(target) dataset and linked service for our SQL server.
Moving forward to the Mapping tab:
This is the one where mapping of source and target fields is done so this is important.
First, import the source schema by clicking on Import Schema. Second, select the collection reference from the data in our source file. Basically, this should be the lowest level of XML tag with is present in the XML document and finally, mark the checkbox to tell the ETL engine that this is a collection reference or array available.

Further, we will map the input columns to the output columns as shown in the screenshot above.
There are times when an XML document can contain a large set of columns and it gets tiresome to map columns 1 on 1 basis so to get over this, we can also get the JSON code of the pipeline and manually edit it to create the mapping.

In the available json code, we can change the source and target column information.

If JSON seems to be complex we can go to the advance editor to select the source and target columns.

In this, we can search for our required column on the source side and on the target side assign it to any column also assign a data type to it.
Once this much work is done, we can save our pipeline and trigger or debug it to see if there are any errors.
This concludes with the copy activity, now we can go ahead with the Dataflow task or the Second method that we discussed earlier in detail.
Dataflow
Let’s create a new pipeline and add dataflow activity to it:

1. Give Data flow a name in the properties window. Select a value for the Staging linked service and the storage folder. This is the staging location for the polybase.

2. Edit the dataflow activity to create the data transformation pipeline.

Here, like our copy activity task, select the Inline dataset and linked Service. Under source options, we need to select the file mode as File and browse for the XML file. Also, since XML files have a lot of namespaces used so we can give an alias to some of them so that code looks manageable. This will help us a lot in further steps.

3. The next task we will use in the data flow is, flatten. Click on the + sign next to the XMLSource and select the flatten from the list of tasks.

In the flatten task we have the option of Unroll by. As the name suggests this task and this option is responsible for creating tabular flat structure of the XML data. Once data is processed by this transformation, it will be in tabular form.
So, it is important to understand the structure of our data and the columns on basis of which we want to unroll the data. As this Unroll by option only accepts array-type data, means there should be more than one row of data (XML tags) at a particular level in the hierarchy.
E.g. Items(1) ->Item(1) -> ItemCategory (1)-> Manufacturing(5)
Below Unroll By, we have an option for Unroll Root. Generally, this should have a root value of the XML file but in case we need to flatten only to a certain level, we can select that too.
4. Next is the derived column transformation that we included to change some of the data or data type while moving data from XML to SQL table.

5. And finally, is the SINK or Target transformation, where we want our data to be stored finally. We can select the target dataset and linked service as described earlier.
For Parameterization
Here in the previously created dataflow. Click anywhere on the white canvas and then under parameters create a new parameter.

Now in the source transformation (XMLSource) like our copy activity task select the Inline dataset and linked Service. Under source options, we need to select the file mode as Wildcard and the container where our source XML is placed. For Wildcard, path selects the parameter we created.

With this, we are done with the dataflow activity.
Metadata and Foreach Activities:
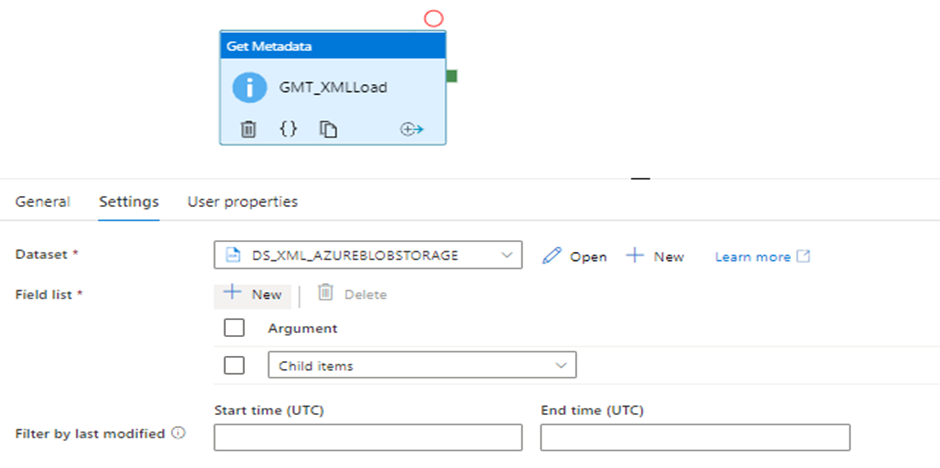
Now to make it more production-ready we tried to make it auto or recursive to run for multiple files in the blob storage. For this, we used Get Metadata and Foreach activities. Get Metadata is responsible to fetch the names of XML files present in the blob storage and Foreach activity recursively triggers our dataflow for all files available. Let’s discuss this in detail.
1. Create a new pipeline and add the Get Metadata activity to it, under Setting Select the source dataset, and in Field List select the child items from the drop-down.
2. Now Include the Foreach activity

1. Under Settings add Item value: @activity('GMT_XMl_Load').output.childItems

This is to fetch the child items of the Metadata activity.
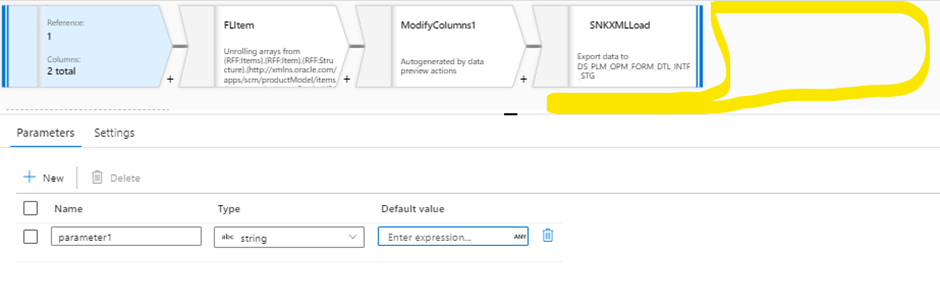
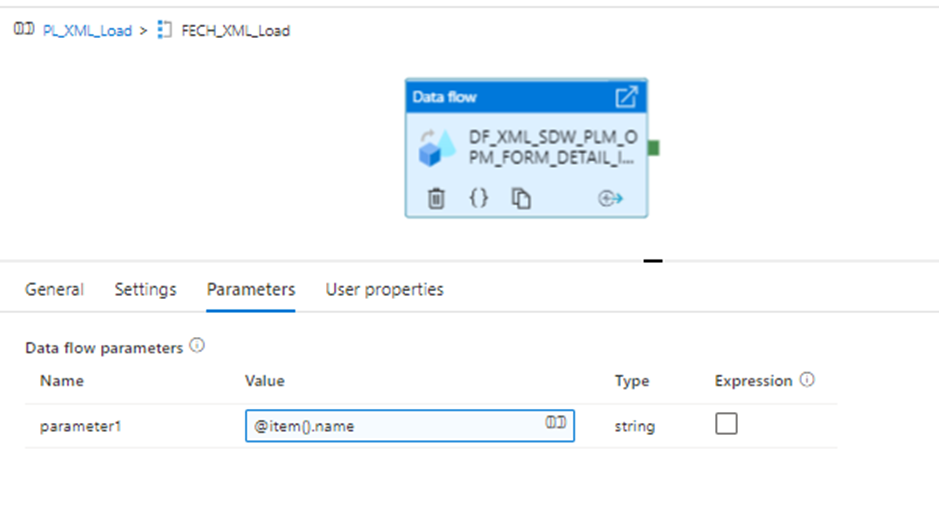
4. Edit the Foreach activity and go to the dataflow and add a parameter by clicking anywhere on the white space .

5. Additionally, if needed, we can also add an Email alert on pipeline failure.

Error Message:
@activity('DF_XML_SAMPLELOAD').error.message
Conclusion:
There are many tools that can parse XML files and load data to a database but when complexity and size are bundled with the XML data in a file not many tools are able to survive the pressure, in such scenarios ADF can be a time saver. With its user-friendly interface and versatile nature, we can achieve our desired results without any hindrance. Of many activities provided we can choose the ones best suited to our task Also Azure date Factory comes with the benefit of a cloud platform where no setup and administration tasks are required before starting with the development activity also scaling up and down for the infrastructure needs can be done on the fly so it also helps up to effectively manage Capex/Opex Expenditure.


Comments